The
most simple solution is to restart the computer, but actually there are
several ways that we can do to overcome a jammed printer when the print
is as follows:
1. Delete documents manually.The first way is to try to remove it manually queue the documents on the print queue window. For
those of you who do not know how to bring it up, simply double-click
the printer icon in the taskbar or click Start, click printers and
faxes, double click on the desired printer icon.
In the print queue window, there are several columns which are:
* Document Name: which is the name of the documents that we print.* Status: status of the document on the spooling queue, paused or printing.* Owner: user name of people who print the document* Pages: displays the number of pages printed and total number of pages.* Size: document size in kilobytes* Submitted: displays time when the document sent to the printer.
To remove a document from the queue list just right click the document and select cancel.
2. Deleting files in the folder C: \ WINDOWS \ system32 \ spool \ PRINTERSIf the first way does not work, then we must remove the document from the spool folder in the folder Windows \ System32. To do this of course accounts that we use must have privelage as Administrator. Here's how to delete these files.
1. Click Start, click Control Panel and select Administrative Tools, click Service2. Look for the "service" whose name and then right-click Print Spooler and select Stop. Do not close old window Service
3. Open the folder C: \ WINDOWS \ system32 \ spool \ PRINTERS4. Delete all files in the PRINTERS folder.5. Return to the Windows Services window, right click on? Print? Spooler and select Start
Once
the files in the folder C: \ WINDOWS \ system32 \ spool \ PRINTERS
removed and the Print Spooler service is active we can begin again to
print the document.
3. Close SessionFor
a printer using that as busy-busy (sharing), sometimes in cases where
there are users who can not send to the printer sharing document the user
while others are not problematic. Usually when we refer to the Printers and Faxes window of the printer status is Unable to connect. To address this we can perform the following steps:
1. Open the Computer Management window. Right-click the My Computer icon, click manage.2. Expand System Tools, then expand Shared Folders, and click Sessions.3. In the right pane a list of users connected to our computer.4. The easiest way is block any user and select close session.5. Then
try again user who had to see the status of the printer in the Printers
and Faxes window, if its status is ready then using that printer
sharing is able to print again.
Showing posts with label Printers. Show all posts
Showing posts with label Printers. Show all posts
Friday, December 23, 2011

How to Fix Error 5100 Service or Canon IP2770 Printer

Steps to Fix Error 5100 Printer Canon IP2770:
Turn off the printer
Remove both cartridges from the printer
Use a cloth moistened with alcohol to clean the surface of the contact / terminal connectors are touching the printer Cartridge / could also use a pencil eraser
Replace the Cartridge
Turn on the printer.
If you find that the printer has not run normally, repeat step 3, but use the cuter / razor blade or knife to clean the surface of the contact / terminal connector Cartridge is swiped touch the printer in a way, but do not let a layer of copper depleted.
Follow the next steps until step 5.
Error 5100 and also can not arise again, I hope this solution will be useful for you
Good luck.
Monday, October 31, 2011
Fix Paper Jam on Canon MP480
Please follow the following procedure to remove the paper:
 1. Slowly pull the paper out, either from the Rear Tray or from the Paper Output Slot, whichever is easier.
 Feeding from the Rear Tray:
(Note: If the paper tears and a piece remains inside the printer, open the Top Cover and remove it. Be careful not to touch the components inside the printer. After removing all paper, close the Top Cover, turn the printer off, and turn it back on.
If you cannot pull the paper out, turn the printer off and turn it back on. The paper may be ejected automatically.)
2. Reload the paper, and press the RESUME/CANCEL button on the printer. Set the Paper Guide correctly when printing from the Rear Tray. The paper may not feed properly if the Paper Guide is not set correctly.
If you turned off the printer in step 1, all print jobs in the queue are canceled. Reprint if necessary.
(Note: When reloading the paper, confirm that you are using the correct paper and are loading it correctly.
A5 sized paper is suited to printing documents consisting mainly of text. We do not recommend using such paper to print documents with photos or graphics, since the printout may curl and cause paper exit jams.)
Thursday, October 20, 2011
Fix Brother DCP-150C "Shut Down by Itself"

2. Check the wall outlet and also the power plug adapter if there is....to make sure it is not a loose connection issue.
3. Check at the back of the printer.. make sure plug is properly inserted.
4. Try to remove other connection, only the plug and observe.
5. Perform a hard reset on your printer.. Unplug all connections from your printer...press the power on to completely drain the power volts....leave it unplugged for thirty minutes..turn the printer on. Observe if the the problem will still persist after few hours of operation.
6. If above suggestions did not work, bring the printer to the nearest service center to fix the power supply board and logic circuit board inside your printer. Most of the times, spilled waste inks on the circuit boards caused this kind of problem.
Good Luck!
Thursday, September 8, 2011
Tips For Printer Using Infus Ink
 There are so many who come to the store computer service for complaints with this one product.
Actually installed on the printer ink infusion with the aim to reduce the cost of printer ink. Because the original ink is quite expensive.
Ink infusion it is a tube with an additional ink is placed on the outside of the printer and supplied into the printer through the IV. Hose mounted on the Canon brand printers are always inserted into the original cartridge. As with the Printer Brand Epson, a hose mounted on a cartridge that is not the original. hose consists of 4 colors, or some types of printers such as Epson R230 hose there are 7 colors.
If you rarely use the printer (say once a week, or once a month) I suggest you not to install the ink infusion. Because the ink infusion usually have problems at a pressure hose, due to differences with the outside air pressure if left long enough will cause the ink drop (air bubbles appear on the hose). And also on the printer head will be quickly damaged, due to which there is always a puddle of ink on the printer head gap. This arises because the ink puddle always contains a full ink cartridge. So you should just use the ink type of injection because head will be more durable.
Note also with your warranty. Printer that has infused the guarantee no longer exists, because the infusion of the printer is ink which is not native of the printer that you buy the product. Infusion is a modification of printer ink which incidentally is not legalized by the printer manufacturers. So it is better if you spend menginfus first new original printer ink.
Well, if you still want your printer menginfus then consider the following suggestions for the printer you are still preserved there:
1. Put the infusion tube is parallel with your printer head. It is intended that the suction pressure of the printer head that takes the ink is not too difficult or not too easy (Balanced). If there is air bubbles in the hose just use the facility "cleaning" of your printer software. Then vacuum the ink had to be replenished. If after cleaning the ink was still not up, then note the hose if there is a leak, or elbow there is a broken / cracked, or rubber also suffered torn elbow. If the hose is torn, try patched hole. If elbow broken, then replace with a new elbow. Or torn rubber also replace with a new one. One thing to note, too, when you lift it high infusion tube then it is a mistake, because a lot will be filled into the ink cartridge and will cause the ink to the printer head overflow. While repairing a hose or elbow please tie first with a rubber hose or duct tape the ink from spilling everywhere.
2. If print quality is not satisfactory, try the print nozzle check. Note whether the ink can go all out or not. Try to do cleaning once or twice. If there is ink that does not appear it's likely there is a blockage in your printer head gap. The fix is:- Tie the hose before the ink from spilling.- Disconnect the hose and elbow of printer cartridges.- Take a piece of tissue and try to stick on the head several times until the ink appears ditissue.- If the ink still does not show-up try to take an injection with an injection of air and exhale through the hole slowly until the ink cartridge out.- When the ink can come out smoothly, but does not appear when printing, then pumping the ink inside the cartridge that is problematic. In this new cartridge must be replaced, because it can not be repaired. This is because the design of the cartridge is sealed with a printer head. When it is opened then closed it again when there will be a gap that resulted in infusion of air into the tube so it will not work normally.- When you have finished making your infusion services, reattach the hose properly, do not get the hose caught on when the printer is used.
3. If this is your first time using ink infusion, then a time will appear an error message that you can not print the result. This is normal, because the cartridge was designed by the manufacturer, an extra prints. The solution is to press and hold the resume button on your printer for 5 seconds. Then the printer will return to print as usual. The purpose of pressing the reset button, is to ignore the error message ink runs out.
4. Do not be surprised if you find that the status of ink in your computer becomes empty after a long time, but you are still a lot of ink infusion. Thisbecause the monitoring system is based on ink cartridge counter the printed paper. Not based on monitoring the number of ink cartridges. So just let the status of your ink is empty existence, yet you can still print.
5. Do not do cleaning too often, because it will result in full on the printer waste ink reservoir. It is usually characterized by the presence of errors Absorber Full. If your printer absorber full, then you should replace your absorbers with a new printer or ink drying exhaust manually, by unpacking your printer. Printer ink absorber in the form of a sponge-shaped beam length and is connected by a hose printer ink. If you have your printer serviced absorber, the printer is also still displays the error message. The solution is to reset counter absorber your printer. For the type of Canon iP1980, iP1880, IP1700, IP1300, IP1200, how to reset absorber as follows:- Turn off your printer first (Power Off)- Unplug the power on- Press and hold the power on- While holding down the power on, plug the power cable back.- While holding down the power on, press the resume button 2x- Disconnect the power on button- Turn the printer- The absorber settings your printer will return 0
6. Always close your re-infusion after using the printer. It is intended that the ink does not flow slowly into the cartridge (ink Locking)
In conclusion, using the ink infusion is very risky to your printer, but if you understand how to use IV then ink your printer will be durable, and can be used on.
How To Fix Printers Error (Canon)
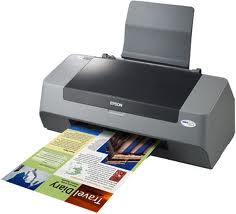
- Blinking, blinking indicator when the printer is turned on
Lightweight solution, this solution means you have to do every time you turn on the printer, because this step is only temporary. When your printer is disconnected from the electrical current, then the blinking will re-emerge. But, do not hurt any of these steps, if you are not familiar with ways to reset the printer using the software.
Disconnect the power cable from your printer.
Press and hold the Power button while you reconnect the power cable.
The power indicator light will appear yellow.
Release the power button, when you are finished installing the power cable.
Then press the power button to turn on your printer.
Ensure your printer is not blinking anymore. But when your printer is disconnected from the electrical current, then the blinking will appear, and you just repeat the above steps.
Solutions Software, you can overcome this by using a blinking disease GeneralTool software specifically for iP iP 1300 and 1700. By using this software, blinking can usually be resolved permanently, that means you do not need to be repeated as in a mild solution above.
2. Blinking, blinking when ink runs out, or when it is complete contents of the ink
Usually the disease struck the printer Canon iP 1880, and occurs when the ink runs out or when you are done filling the ink. Or even the ink is not depleted, but blinking is often plagued iP 1880. One solution:
Press and hold the "Resume" for about 1 to 2 minutes
Then open the lid or cover of your printer.
Open the old cartridge and attach it again
Close the printer cover
Turn off and back
3. Print the letter dashed (striped), uneven
Try to do cleaning several times, if this does not work as well, you clean your catrige manually. But, the best solution, based on the experience of some users, is it's time you change your printer Catrige.
4. Overcoming the "ink absorber is full" on the Canon IP1700 and IP1200
Turn the printer off and unplug the power cable
Press and hold the power button (not released) while then plug back the power cord
When the power button is pressed and the power cable is plugged back, press the resume button twice (consecutive)
Release the power button
Completed
Now your computer will detect a new printer, follow the steps required until then installed a new printer.
5. Solution "The waste ink absorber is almost full" and "ink absorber is full" on the Canon IP3000 and IP2000
Turn off the printer
Press the reset button and then press the power button
Press and hold the power button and then release the resume button
Press the resume button 2 times in succession and then release both buttons (the reset button and power button)
Indicator will appear green
When the indicator is green, then press the resume button 4 times
Press the power button, the printer off (turn off), if not press the power button
The printer returns to normal.
Saturday, August 6, 2011
How to Reset Your Printer? Troubleshooting for Resetting Your Hp, Dell, Lexmark, Brother or Samsung Printers
Resetting an HP laser printer
There is a technique known as cold resetting. It basically will set all your HP printer settings to the factory default levels. It is important to note that any settings made at the control panel of your printer are going to be reset. Hence, in case you happen to have a JetDirect card then even the IP address will be reset to the factory defaults. You can try to reset NVRAM. To do this, switch off your HP printer and then hold down the ‘Go’ key for around 20 seconds while switching the printer back on again.
- HP 1200 and 1100 models resetting: To do this, simply change the data by going into the service mode. This is applicable if your HP printer has a display panel. Otherwise you need to hold down the ‘Go’ button for around 5 seconds while the printer is switched on.
- HP 2100 printer resetting: You need to press the ‘job cancel’ key after switching off the printer. Then switch the printer on and only then release the key called ‘job cancel.’
- HP 2200 printer resetting: Switch off your printer and then hold down the ‘Go’ key. Switch back the printer on while holding the ‘Go’ button till the light comes on. Then release the button.
- HP 6P and 5P models resetting: Switch off your printer and then press the ‘reset’ button and within 20 seconds switch on the printer back again.
Resetting a Dell printer
You can reset your Dell printer fairly easily by simply double-clicking on the ‘Reset Dell Printer’ icon. You can reach this icon by clicking on the folder ‘UAN’, then clicking on ‘System Utilities’ and you should find the icon. However, one word of caution – this method will function only if the USB cable has been directly connected from the PC to the printer.
Resetting a Lexmark printer
You will firstly need to switch off your printer. Then simultaneously press the RETURN and READY keys while switching the printer on. This will take you to the Diagnostics Mode. The display unit will show the message ‘Performing self test’. Choose ‘Maintenance count’. Reset the count to make it zero. Then select the RETURN key and go back Diagnostics Mode. Then you can reset the printer to go back to the normal mode.
Resetting Brother Printer
You need to keep pressing the DOWN or UP keys a couple of times till you see ‘Maintenance 99’ displayed on the display. Then hold down the ‘Set’ button to go to standby mode. Please note that if you press the exit key only after typing in a single digit then the machine goes to maintenance mode in initial stages.
Resetting Samsung printer
You need to press the following keys in quick succession – MENU # 1 9 3 4. Then you should see a message on your display saying ‘TECH.’ Then again select the MENU key followed by ENTER. The display will now show ‘TECH MODE.’ Then select the ‘<’ key two times. Your operator panel should show ‘NEW CARTRIDGE’. Then select ENTER. Now the panel will show [YES]. Select ENTER key again. You can exit from this mode by pressing MENU # 1 9 3 4 again one after another.
There is a technique known as cold resetting. It basically will set all your HP printer settings to the factory default levels. It is important to note that any settings made at the control panel of your printer are going to be reset. Hence, in case you happen to have a JetDirect card then even the IP address will be reset to the factory defaults. You can try to reset NVRAM. To do this, switch off your HP printer and then hold down the ‘Go’ key for around 20 seconds while switching the printer back on again.
- HP 1200 and 1100 models resetting: To do this, simply change the data by going into the service mode. This is applicable if your HP printer has a display panel. Otherwise you need to hold down the ‘Go’ button for around 5 seconds while the printer is switched on.
- HP 2100 printer resetting: You need to press the ‘job cancel’ key after switching off the printer. Then switch the printer on and only then release the key called ‘job cancel.’
- HP 2200 printer resetting: Switch off your printer and then hold down the ‘Go’ key. Switch back the printer on while holding the ‘Go’ button till the light comes on. Then release the button.
- HP 6P and 5P models resetting: Switch off your printer and then press the ‘reset’ button and within 20 seconds switch on the printer back again.
Resetting a Dell printer
You can reset your Dell printer fairly easily by simply double-clicking on the ‘Reset Dell Printer’ icon. You can reach this icon by clicking on the folder ‘UAN’, then clicking on ‘System Utilities’ and you should find the icon. However, one word of caution – this method will function only if the USB cable has been directly connected from the PC to the printer.
Resetting a Lexmark printer
You will firstly need to switch off your printer. Then simultaneously press the RETURN and READY keys while switching the printer on. This will take you to the Diagnostics Mode. The display unit will show the message ‘Performing self test’. Choose ‘Maintenance count’. Reset the count to make it zero. Then select the RETURN key and go back Diagnostics Mode. Then you can reset the printer to go back to the normal mode.
Resetting Brother Printer
You need to keep pressing the DOWN or UP keys a couple of times till you see ‘Maintenance 99’ displayed on the display. Then hold down the ‘Set’ button to go to standby mode. Please note that if you press the exit key only after typing in a single digit then the machine goes to maintenance mode in initial stages.
Resetting Samsung printer
You need to press the following keys in quick succession – MENU # 1 9 3 4. Then you should see a message on your display saying ‘TECH.’ Then again select the MENU key followed by ENTER. The display will now show ‘TECH MODE.’ Then select the ‘<’ key two times. Your operator panel should show ‘NEW CARTRIDGE’. Then select ENTER. Now the panel will show [YES]. Select ENTER key again. You can exit from this mode by pressing MENU # 1 9 3 4 again one after another.
Subscribe to:
Posts (Atom)
